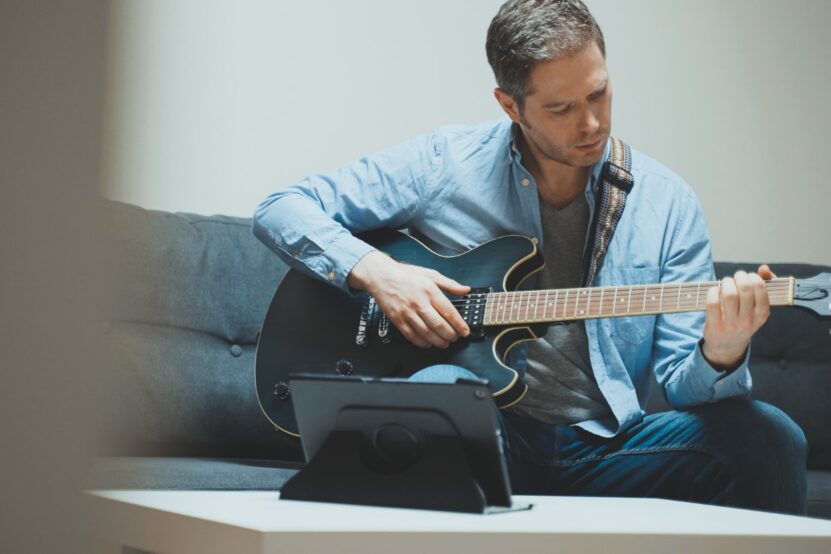
Creating a well-organized guitar pedalboard is essential for achieving a clean, professional sound. Proper setup ensures that each effect functions optimally and helps you manage your gear more efficiently. This guide will provide you with clear, step-by-step instructions to help you assemble your pedalboard.
Choose the Right Pedalboard
Selecting the right pedalboard is the first crucial step in setting up your guitar pedalboard.
Size
- Assess Your Needs: Determine the number of pedals you plan to use and their sizes. This will help you choose a pedalboard that fits your current setup with room for future additions.
- Measure Space: Make sure the pedalboard has enough space to accommodate all your pedals, including any additional accessories like power supplies and cables.
Style
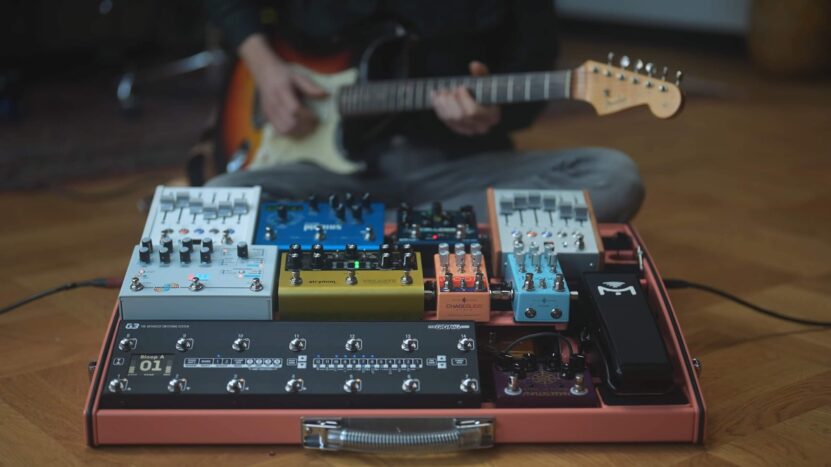
- Angled Pedalboards: These allow you to mount power supplies and cables underneath, keeping the top surface clear for pedals. The angled design makes it easier to access pedals, especially those at the back.
- Flat Pedalboards: These are simpler and often cheaper. They work well for single-row setups and can sometimes accommodate power supplies and cables underneath, depending on the design.
- Case Pedalboards: Ideal for gigging musicians, these pedalboards come with a protective case for easy transport and storage, keeping your setup secure and clutter-free.
Material
- Durability: Look for pedalboards made from sturdy materials like aluminum or steel, which can withstand regular use and transportation.
- Weight: Consider the weight of the pedalboard, especially if you plan to carry it to gigs. Lightweight materials like aluminum can be advantageous for portability without compromising on strength.
Power Supply Integration
Ensure the pedalboard has space for integrating a power supply. Some pedalboards come with built-in power supply mounts or brackets, making it easier to manage power cables and connections.
Gather Your Equipment
| Equipment | Purpose |
|---|---|
| Pedals | Create various effects for your guitar sound |
| Pedalboard | Holds and organizes your pedals |
| Power Supply | Powers all your pedals |
| Patch Cables | Connect pedals to each other |
| Instrument Cables | Connect guitar to pedalboard and amp |
| Velcro | Secure pedals to the pedalboard |
Gathering all the necessary equipment is a crucial step in setting up your pedalboard.
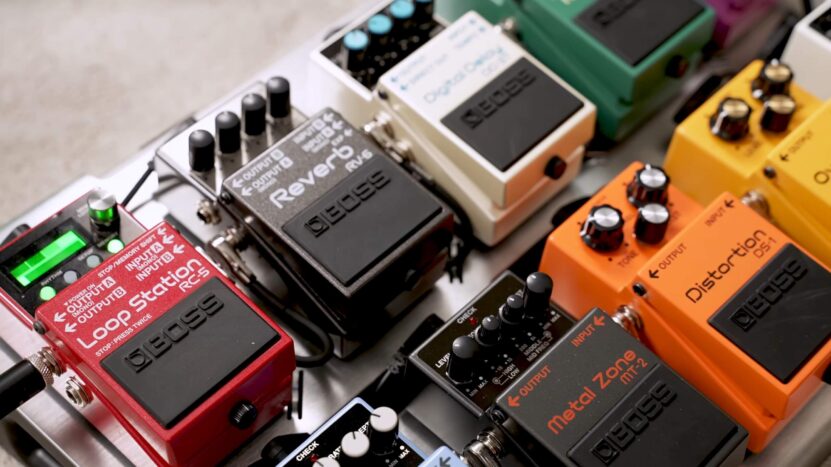
Pedals
- Types: There are various types of pedals, including distortion, overdrive, delay, reverb, modulation (chorus, flanger, phaser), and dynamic (compressors, noise gates) pedals. Each pedal serves a specific function to shape your guitar sound.
- Selection: Choose pedals based on the music style you play and the effects you desire. Popular choices include the Ibanez Tube Screamer for overdrive, the Boss DD-3 for delay, and the Electro-Harmonix Big Muff for fuzz.
Pedalboard
- Function: The pedalboard holds all your pedals in place and provides a structure for easy transportation and organization. Make sure it fits all your pedals with space for future additions.
- Types: As discussed earlier, pedalboards come in different styles like angled, flat, and case-style. Choose one that suits your setup needs and gigging requirements.
Power Supply
- Importance: A reliable power supply is essential to ensure your pedals receive consistent power. Most standard pedals require 9 volts.
- Options: You can use a daisy chain to power multiple pedals from a single source, but isolated power supplies are preferred to prevent noise and hum issues.
Patch Cables
- Purpose: Patch cables connect your pedals to each other. Use high-quality, short cables to minimize signal loss and noise.
- Types: Right-angle patch cables are often more compact and help keep your setup tidy.

Instrument Cables
- Function: These cables connect your guitar to the pedalboard and the pedalboard to your amplifier. Ensure they are long enough to accommodate your setup but not so long that they cause clutter or signal degradation.
Velcro
- Securing Pedals: Use Velcro strips to attach your pedals securely to the pedalboard. This prevents them from moving during use and makes it easy to rearrange them if needed.
Plan Your Layout
Planning your layout is a critical step in setting up your guitar pedalboard, ensuring that all pedals are positioned for optimal use and accessibility.
List Pedals
- Inventory: Start by making a comprehensive list of all the pedals you currently own or plan to acquire. This helps you visualize the entire setup and ensures nothing is overlooked.
Prioritize Pedals
- Essential vs. Optional: Identify which pedals are essential for your setup and which ones are optional. Essential pedals might include tuners, distortion, and reverb, while optional ones could be modulation effects like chorus or flanger.
- Frequency of Use: Prioritize pedals based on how often you use them. Frequently used pedals should be placed in easily accessible positions on the board.
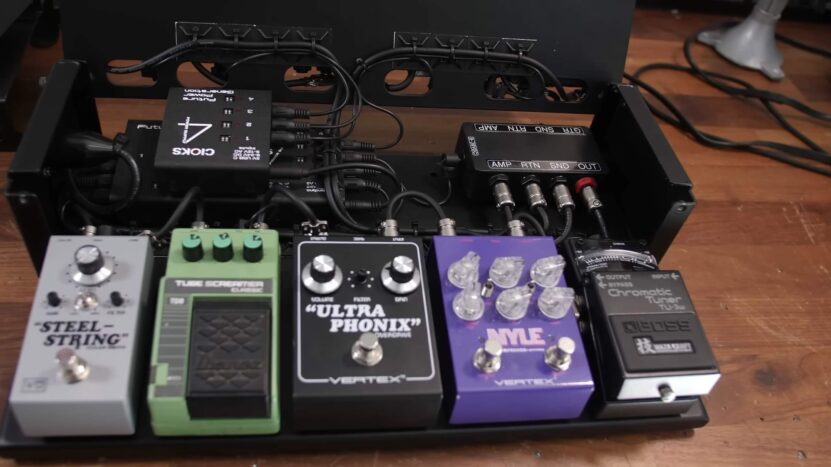
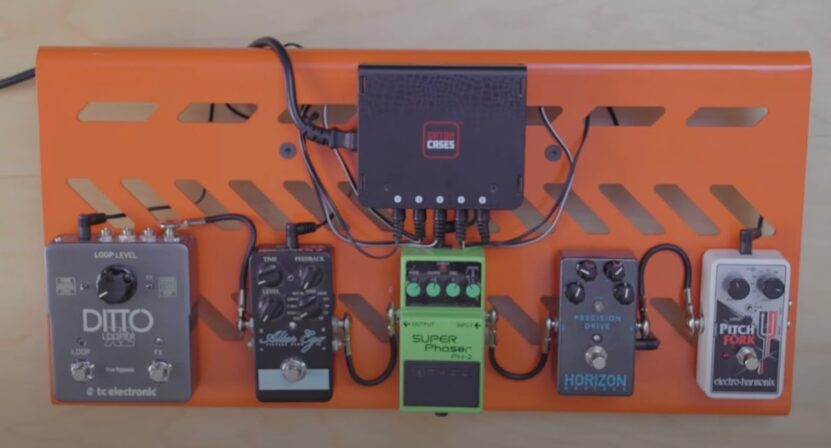
Arrange Pedals
- Initial Layout: Lay out the pedals on the board without attaching them. Arrange them in the order they will be connected, typically starting from the tuner and moving through gain stages, modulation, and time-based effects.
- Group by Type: Group similar pedals together, such as placing all gain pedals in one section and modulation effects in another. This organization helps in managing cables and maintaining a clean setup.

Consider Access
- Accessibility: Place the most frequently used pedals nearest to you for easy access during performances. For example, if you use your distortion pedal often, ensure it is placed where you can easily reach it with your foot.
- Staggering Pedals: Stagger the pedals between the front and back edges of the pedalboard to avoid any confusion during performances. This makes it easier to navigate the pedalboard and prevents accidental activation of the wrong pedal.
Experiment with Order
- Test Different Configurations: Experiment with the order of your pedals to find the best sound. While there are general guidelines for pedal order, such as placing distortion before delay, the final setup should be based on what sounds best to you.
- Signal Chain Considerations: Pay attention to how different pedals interact with each other. For instance, placing a compressor before an overdrive pedal can affect the dynamics and tone significantly.
Set Up the Signal Chain
Setting up the signal chain correctly is crucial for achieving the best sound quality and functionality from your pedalboard.
Understand the Signal Chain Order
Typical Order:
- Tuners
- Filters (like wah and auto-wah)
- Dynamics (compressors)
- Gain (overdrive, distortion, fuzz)
- Modulation (chorus, flanger, phaser)
- Time-based effects (delay, reverb)
This order ensures that each pedal processes the cleanest possible signal and that time-based effects enhance the final tone rather than getting muddled earlier in the chain.
Connecting the Pedals
- Input and Output: Connect the output of your guitar to the input of the first pedal in your chain. Then, connect the output of each pedal to the input of the next pedal in the sequence. Finally, connect the output of the last pedal to your amplifier.
- Patch Cables: Use high-quality patch cables to connect the pedals. Short, right-angle patch cables help keep the setup tidy and reduce signal loss.
Buffers and True Bypass
- Buffers: Buffers help maintain signal strength over long cable runs and through multiple pedals. Consider placing a buffer at the start and end of your signal chain if you experience signal degradation.
- True Bypass: True bypass pedals do not affect the signal when they are off, but using too many can result in signal loss. Balance your use of true bypass and buffered pedals to maintain signal integrity.
Experiment with Placement
- Fine-Tuning Order: While the typical order works for most setups, experimenting with pedal placement can yield unique sounds. For example, placing a delay before distortion can create different effects than the typical order.
- Individual Preferences: Personal taste and specific pedal interactions play a significant role. Some guitarists prefer unconventional setups that better suit their playing style and tonal preferences.
Using the Effects Loop
- Amp’s Effects Loop: Some amplifiers have an effects loop, which is a send and return circuit between the preamp and power amp stages. Using the effects loop for time-based effects like delay and reverb can result in a clearer sound, especially if you use the amp’s preamp for overdrive and distortion.
- Connection: Connect the end of the effects loop to the input of your time-based pedals and the output of these pedals to the return of the effects loop.
Conclusion
Setting up a guitar pedalboard involves several important steps, from choosing the right board and gathering your equipment to planning the layout, setting up the signal chain, and securely attaching your pedals. By following these steps, you can create an efficient and well-organized pedalboard that enhances your sound and performance.